How to Use a Coffee Machine with Pods — The Complete Home Guide
- LondonKart
- Nov 7, 2025
- 18 min read
Picture this: It's 6:30 AM, you're rushing to get ready for work, and all you want is that perfect cup of coffee without the hassle of grinding beans or measuring scoops. That's where pod coffee machines come in—your personal barista that delivers café-quality drinks in under a minute.
I've spent two decades exploring every corner of the coffee world, and I can tell you this: pod machines have revolutionized how we brew at home. They've turned complicated espresso-making into something anyone can master, whether you're a coffee newbie or a seasoned enthusiast looking for convenience.
In this guide, I'll walk you through everything you need to know about how to use a coffee machine with pods—from your very first brew to keeping your machine running smoothly for years. We'll cover setup, daily brewing tips, troubleshooting, and those little tricks that separate an okay cup from an amazing one. By the time you finish reading, you'll be brewing like a pro and understanding exactly why millions of coffee lovers worldwide have made the switch to pod systems.
Let's get your morning routine upgraded!
What is a Coffee Machine with Pods?
A coffee machine with pods (also called a capsule machine) is a single-serve brewing system that uses pre-packaged, sealed portions of ground coffee. Think of it as the modern answer to traditional coffee makers—instead of scooping, measuring, and dealing with messy filters, you simply pop in a pod and press a button.
Here's what makes these machines different from your regular drip coffee maker or bean-to-cup system: They use pressure-based extraction. Most pod systems force hot water through the coffee grounds at high pressure (usually 15-19 bars), similar to professional espresso machines. This creates that rich, concentrated flavor and beautiful crema you'd normally only get at a café.
The main pod systems you'll encounter:
Nespresso Original Line – Uses aluminum capsules designed for espresso and espresso-based drinks. These are the most common and what most people think of when they hear "coffee pods."
Nespresso Vertuo – A newer system using larger capsules with barcode technology. It brews everything from espresso shots to full mugs by spinning the capsule at high speed.
E.S.E. Standard Pods – These are paper-wrapped pods (they look like tea bags) that work with compatible machines. They're softer than rigid capsules and often considered more environmentally friendly.
The beauty of a single serve coffee capsule machine is its simplicity. Each pod contains precisely measured coffee, sealed to lock in freshness. No guesswork, no waste, no cleanup beyond tossing the used pod—just consistent, delicious coffee every single time.
Why Use a Coffee Machine with Pods? (Benefits & Considerations)
The Benefits That'll Make You Smile
Speed and convenience – This is the big one. From cold start to hot cup in your hand? About 90 seconds. Perfect for those chaotic mornings when you're juggling breakfast, emails, and getting the kids ready.
Consistency you can count on – Every pod is precisely measured and sealed at the factory. That means your Tuesday morning brew tastes exactly like your Saturday afternoon pick-me-up. No more "too weak" or "way too strong" surprises.
Minimal mess – Remember coffee grounds everywhere? The stained filters? The countertop cleanup? Yeah, those days are over. Used pods go straight into a container, and you're done.
Incredible variety – Here's where it gets exciting. With platforms like Londonkart, you've got access to hundreds of flavors—from bold Italian roasts to smooth Colombian blends, flavored options, decaf, and even specialty drinks. It's like having an entire café menu in your kitchen.
Things to Keep in Mind
Let's be real—no system is perfect, and you deserve the full picture.
Cost per cup – Pods typically cost more per serving than buying bulk ground coffee. You're paying for convenience and consistency. For most people, the time saved and quality gained make it worth every rupee.
Environmental considerations – Traditional aluminum or plastic pods do create waste. The good news? Many brands now offer recycling programs, and you can find compostable pods or reusable options (we'll discuss these later). Londonkart stocks several eco-conscious choices if this matters to you.
Compatibility matters – Not all pods work with all machines. A Nespresso Original pod won't fit in a Vertuo machine, and vice versa. Always check compatibility before buying—this saves money and frustration.
Why This System Shines in Indian Homes
I've noticed something interesting working with coffee lovers across India: pod machines fit perfectly into our modern, fast-paced lifestyle.
Most Indian households are dealing with longer commutes, dual-income families, and packed schedules. Taking 15 minutes to brew coffee the traditional way? That's a luxury we often don't have on weekday mornings.
Plus, as Indian kitchens modernize, these sleek machines complement contemporary designs beautifully. They take up minimal counter space—crucial in urban apartments where every square inch counts.
The best part? Local availability has exploded. Platforms like Londonkart have made premium pods accessible across the country, often with faster delivery than ordering from international sites. You're not compromising on quality or variety anymore.
Step-by-Step: How to Use a Coffee Machine with Pods
Alright, let's get practical. Whether you just unboxed your first pod coffee machine or you're looking to improve your technique, this section covers everything. I'll share the coffee pods machine how to use process from setup to that first perfect sip.
Setup and First Use
Unboxing Your New Machine
Remove all packaging materials—tapes, plastic protectors, styrofoam inserts. Check that you have the drip tray, water tank, and power cord. Most machines also include a sample pack of pods to get you started.
The Critical First Flush (Don't Skip This!)
Here's something many new users miss, and it's absolutely essential: your machine needs a thorough flush before brewing your first real cup. During manufacturing and shipping, dust and residue can settle inside.
Fill the water tank with fresh, preferably filtered water. Turn on the machine and let it heat up (you'll usually see a steady light instead of a blinking one). Now here's the trick I learned from years of testing machines: Run a blank cycle without any pod.
Place a large cup under the spout and start a brew cycle. Stop it when your cup is about 3/4 full of hot water, then dump it out. Do this twice. This cleans out the internal system and ensures your first real brew tastes like coffee, not factory.
Power Up and Prep
Make sure your water tank is filled to the maximum line. Some machines won't operate if the water level is too low—it's a safety feature. Give your machine 30-45 seconds to heat up completely. Most models have indicator lights that tell you when they're ready to brew.
Best Practices During Daily Use
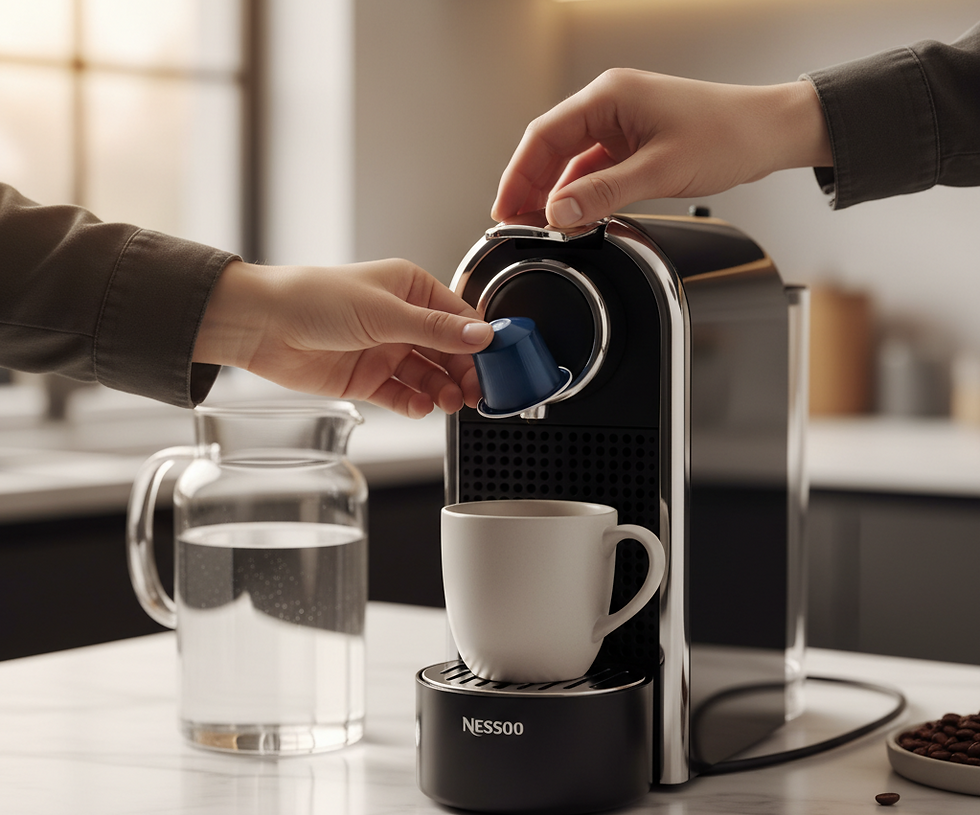
Inserting Your Pod the Right Way
This seems simple, but coffee pod insertion done correctly makes a huge difference. Lift the lever or open the chamber completely. Place your pod into the holder—flat side down, pointed side up (for most systems). Don't force it; it should sit naturally.
Close the lever firmly until you hear a click or feel resistance. This punctures the pod and creates a proper seal. If your machine doesn't brew or leaks water, nine times out of ten it's because the lever wasn't fully closed.
Brewing Your Perfect Cup
Place your cup directly under the spout. Make sure it's positioned to catch all the coffee—sounds obvious, but I've seen plenty of spills!
Select your brew size. Most machines offer at least two options:
Espresso (25-40ml) – Strong, concentrated shot
Lungo (110-150ml) – Longer, milder coffee
Press the brew button and watch the magic happen. The entire process takes 25-40 seconds for an espresso, a bit longer for larger sizes.
Pro tip for better taste: Preheat your cup! Run a quick shot of hot water into your cup before brewing, swirl it around, dump it out, then brew your coffee. This keeps your drink hot longer and helps develop better flavor. Trust me on this one—it's the difference between good coffee and great coffee.
Adjusting Your Brew
Want a shorter, more intense shot? You can usually stop the extraction early by pressing the button again. Prefer a milder, larger cup? Let it run longer if your machine allows manual control. After a few tries, you'll find your perfect sweet spot.
Ejecting the Used Pod
Most machines automatically eject used pods into an internal container when you lift the lever for the next brew. Some require you to open a compartment and remove them manually. Here's what's crucial: Don't leave the pod sitting in the brewing chamber until your next coffee.
Why? Used coffee grounds left in a warm, damp environment are a perfect breeding ground for mold and bacteria. They'll also make your machine smell stale and can cause clogs. Remove used pods promptly—it takes five seconds and saves you headaches later.
Maintenance & Cleaning
Let's talk about keeping your coffee capsule machine running smoothly. Good maintenance isn't just about extending your machine's life—it directly affects taste quality.

Daily Cleaning (Takes 2 Minutes)
Empty the drip tray every day or when the indicator shows it's full. Rinse it with warm water and wipe it clean. This prevents buildup and potential mold growth.
Clear the used pod container after every few brews. Again, don't let used pods sit around. I've seen people ignore this for days, then wonder why their coffee tastes off or their kitchen smells weird.
Rinse the water tank daily. Stagnant water develops bacteria and affects taste. Fresh water = fresh coffee. It's that simple.
The Critical "No Pod Left Behind" Rule
I cannot stress this enough: Never leave a used pod in the brewing chamber overnight (or even for a few hours if you can help it).
Here's what happens when you do: The leftover grounds stay damp and warm. Within hours, they start developing that stale, musty smell. If left longer, you're looking at potential mold growth. This isn't just gross—it can actually make you sick and will definitely ruin your next cup's flavor.
Used pods can also cause the needle that punctures the capsule to clog with dried grounds. Then your machine won't brew properly, or it'll leak water everywhere. Quick removal prevents all of this.
Weekly Deep Clean
Once a week, remove and wash all detachable parts: drip tray, pod container, water tank. Use warm soapy water and rinse thoroughly. Let them air dry.
Wipe down the exterior with a damp cloth. Clean around the pod chamber area where coffee oils might accumulate.
Descaling: The Game-Changer
How to clean a coffee capsule machine properly always comes back to descaling. This is the single most important maintenance task, yet it's the one people skip most often.
What is scale? Minerals in water (especially calcium and magnesium) build up inside your machine over time. This scale restricts water flow, lowers brewing temperature, and makes your coffee taste weak or bitter.
How often should you descale? Standard advice is every 3-6 months or after 300 pods. But here's something specific to India: our water is often harder than in many Western countries. If you're in cities like Delhi, Mumbai, Pune, or Bangalore, you might need to descale every 2-3 months.
Signs you need to descale right now:
Brew time takes noticeably longer
Coffee comes out lukewarm instead of hot
Reduced crema or weak flavor
Machine makes unusual noises or stops mid-brew
How to descale: Most manufacturers sell descaling solution (follow their instructions), or you can use white vinegar diluted with water. Run the solution through the machine, let it sit for 15 minutes, then run several cycles of fresh water to rinse completely.
Always use filtered water if possible. It reduces scale buildup and improves taste. In Indian metros where water quality varies, this small change makes a massive difference.
Choosing the Right Pods & Machine Features
Understanding Pod Types
Not all pods are created equal, and choosing the right ones for your machine and taste preferences is half the battle.
Espresso pods are designed for small, concentrated shots (25-40ml). These are your base for lattes, cappuccinos, and macchiatos. They pack intense flavor into a tiny serving.
Lungo pods deliver a larger volume (110-150ml) with a milder taste. Think of these as your "regular coffee" option.
Mug-size pods (mainly in Vertuo systems) brew full cups (230-414ml) similar to what you'd get from a drip coffee maker.
The compatibility trap: This catches everyone at least once. Nespresso Original pods don't work in Vertuo machines. E.S.E. pods need specific compatible machines. Before stocking up on pods, double-check your machine's system. Londonkart's product pages clearly indicate compatibility, so you won't end up with unusable pods.
Machine Features Worth Having
When shopping for a single serve coffee capsule machine or understanding what yours can do, these features matter:
Auto-off function – Saves energy by shutting down after 9 minutes of inactivity. Great for forgetful mornings (we've all been there).
Water tank size – Larger is better if multiple people are using it or you don't want to refill daily. Look for at least 0.6-liter capacity.
Used pod container capacity – Check how many pods it holds. Smaller containers mean more frequent emptying.
Programmable cup sizes – Ability to save your preferred volumes means perfect coffee with one button press.
Energy efficiency – Newer models heat up faster and use less power. Better for your wallet and the planet.
Sustainability: Making Responsible Choices
Let's address the elephant in the room: pod waste. It's a legitimate concern, but there are solutions.
Recycling programs – Nespresso runs a collection program where you can drop off used capsules at collection points. They separate the aluminum and coffee grounds for proper recycling and composting.
Compostable pods – Several brands now offer pods made from plant-based materials that break down completely. Londonkart stocks multiple compostable options that don't compromise on flavor.
Reusable pods – These are metal or plastic pods you fill with your own ground coffee. They're cost-effective and eliminate waste entirely. The trade-off? You lose some convenience since you're measuring and cleaning them yourself.
My recommendation: If you're using 2-3 cups daily, consider reusable pods for weekdays and keeping premium single-use pods for special brews or when you need maximum convenience. It's a balanced approach that reduces waste without sacrificing quality.
Troubleshooting Common Problems
Let's fix the issues that frustrate pod machine owners most. I've encountered all of these over the years, and the solutions are usually simpler than you'd think.
Weak Brew or Poor Extraction
Your coffee tastes watery or lacks that rich flavor you're expecting. Here's what's likely happening:
Check your water level first. Low water affects pressure and temperature, resulting in under-extracted coffee. Fill to the maximum line.
Verify the pod is seated correctly. If it's not positioned properly or the lever isn't fully closed, water bypasses the coffee instead of flowing through it. Open and reseat the pod, ensuring you hear that firm click.
Scale buildup is your enemy. This is the most common culprit for weak coffee. When mineral deposits restrict water flow, your machine can't generate proper pressure or temperature. Solution: Descale immediately following your manufacturer's instructions.
Using the wrong pod size? An espresso pod set to lungo volume will taste weak because you're over-extracting. Match your pod type to your brew size.
Machine Won't Brew or Chamber Jam
Press the button and... nothing happens. Or worse, it starts then stops mid-cycle.
Simple restart first: Turn off the machine, unplug it for 30 seconds, plug back in, and try again. This resets the electronics and fixes minor glitches.
Check for a stuck or misplaced pod. Open the chamber and make sure no pod is jammed or torn. Sometimes a punctured pod can lodge coffee grounds in the needle mechanism.
Inspect the needles that puncture the pod. If they're clogged with dried coffee, gently clean them with a paperclip or the cleaning tool that came with your machine. Be careful not to damage them.
Water tank might not be properly seated. Remove and reattach the tank, ensuring it clicks into place. Many machines have sensors that won't allow brewing if the tank isn't detected.
Off Taste or Slow Flow
Your coffee tastes weird—metallic, bitter, or just "off." Or it drips out slowly instead of flowing smoothly.
Slow flow = descaling time. There's no way around it. Scale restricts the internal passages, and no amount of pod switching will fix the taste until you descale.
Run a blank shot before your actual coffee. This flushes out any residual stale coffee from the spout and ensures clean flavor.
Old or stale pods? Check the expiration date. While pods have long shelf lives, they do eventually lose flavor. Store them in a cool, dry place away from direct sunlight.
Machine hasn't been cleaned in weeks? Coffee oils build up in the chamber and on the needle, creating rancid flavors. Do a thorough cleaning of all removable parts.
"What Do I Do With the Coffee Once It's Brewed?"
I love this question because it shows someone is genuinely new to pod machines, and there's zero judgment here. We all start somewhere!
For espresso shots (25-40ml): This small, concentrated coffee is meant to be the base for other drinks. Add steamed milk for a latte or cappuccino, hot water for an Americano, or cold milk over ice for an iced latte. You can drink it straight if you love intense coffee, but it's strong!
For lungo or mug-size brews (110ml+): These are ready to drink as-is, like a regular cup of coffee. Add milk, sugar, or sweetener to taste. These larger volumes are already diluted to drinking strength.
Can I add milk to the machine? No! Never run milk through your pod machine. Only use room temperature or cold water in the tank. The machine heats the water internally. Add milk or cream to your cup after brewing. Running milk through the machine will clog it permanently and void your warranty. Trust me—I've seen the expensive repairs this causes.
Indian-Specific Water Challenges
Living in India comes with unique coffee-making challenges, specifically our water quality.
Hard water is the norm in most Indian cities. Delhi, Pune, Jaipur, Ahmedabad—all have high mineral content in tap water. This means faster scale buildup and more frequent descaling needs.
My advice: Invest in a simple water filter pitcher or use bottled water for your coffee machine. The improvement in taste is immediate, and you'll descale half as often. The small added cost is worth the better coffee and longer machine life.
If you notice white, chalky deposits on your drip tray or inside the water tank, that's scale forming. Don't wait for the recommended 3-month descaling interval—do it when you see buildup.
Hacks & Pro Tips to Get More From Your Pod Machine
These are the little tricks that separate casual users from coffee enthusiasts who consistently brew exceptional cups.
The Warm Mug Rule (Worth Repeating)
I mentioned this earlier, but it deserves its own spotlight: Preheat your mug.
Cold ceramic cups immediately drop your coffee's temperature by 10-15 degrees. That's enough to mute flavors and ruin the experience. Run hot water into your cup for 10 seconds, swirl it around, dump it out, then brew. This 15-second habit transforms your coffee.
The Daily "Blank Shot" Rinse
Every morning before your first brew, run a shot of hot water without a pod. This does three things:
Cleans out the brewing chamber and spout
Heats up the entire system for better extraction
Ensures no stale flavors from yesterday's coffee
It uses minimal water and takes 20 seconds. Make it part of your routine.
Alternative Drinks to Try
Iced coffee done right: Brew your espresso directly over a glass filled with ice cubes. The rapid cooling locks in flavor and creates a sweet, smooth drink. Add cold milk and sugar syrup if desired.
Authentic Americano: Brew an espresso pod into a cup already containing hot water (not the other way around). This preserves the crema and creates that smooth, café-style Americano.
Quick cold brew hack: Brew a lungo pod at its strongest setting, let it cool completely, then refrigerate overnight. It won't replace real cold brew, but it's surprisingly good for a quick fix.
The Milk Warning (Critical Information)
Only run room temperature water through your machine. The internal heating element brings it to the perfect brewing temperature.
Add milk, sugar, syrups—everything else—to your cup after the coffee is brewed. Do not attempt to brew milk, sweetened water, or anything other than plain water through the system.
Why is this so important? Milk contains proteins and fats that clog the internal tubes permanently. Sugar caramelizes and creates sticky, impossible-to-clean deposits. These aren't just inconveniences—they can destroy your machine beyond repair.
If you want milk drinks, get a separate milk frother (manual or electric). They're inexpensive and give you café-quality foam for lattes and cappuccinos.
Pod Storage Tips
Keep pods in their original packaging or an airtight container. Exposure to air, humidity, and light degrades coffee flavor faster than you'd think.
Don't store them near your stove or in direct sunlight. Heat accelerates staleness.
Buy variety packs from Londonkart to experiment before committing to large quantities of one flavor. Your taste preferences might surprise you.
Cost Optimization
Watch for bundle deals and subscription options. Many retailers, including Londonkart, offer discounts for bulk purchases or regular deliveries.
Mix premium pods (for your morning treat) with more economical compatible pods (for your afternoon cups). Not every brew needs to be the most expensive pod.
Use reusable pods for daily consumption if you're brewing multiple cups. Save the specialty pods for weekends or when you want something special.
FAQ Section
Q1: Can I use regular ground coffee instead of pods in these machines?
No, not directly. Pod machines are specifically engineered for pre-packaged, sealed pods that maintain precise pressure during extraction. Regular ground coffee won't create the necessary seal.
However, you can purchase reusable pod adapters for most systems. These are metal or plastic capsules you fill with your own ground coffee. Make sure your machine is compatible with reusable pods—not all are. The advantage? Massive cost savings and the ability to use any coffee you like. The trade-off is more cleanup and slightly less convenience.
Q2: What is the difference between pod and capsule machines?
The terms are often used interchangeably, but there's a technical distinction:
Pods (E.S.E. standard) are soft, paper-wrapped portions of ground coffee, similar to tea bags. They're typically 44mm in diameter and work in compatible pod machines.
Capsules are rigid containers made of aluminum or plastic (like Nespresso Original or Vertuo). They're sealed and require the machine to puncture them during brewing.
For practical purposes, when someone says "pod machine," they usually mean any single-serve coffee maker, regardless of whether it uses soft pods or rigid capsules. Both deliver convenient, consistent coffee—just through slightly different mechanisms.
Q3: Why is my pod machine brewing weak coffee?
This is one of the most common complaints, and there are usually four culprits:
Wrong pod for your brew size – Using an espresso pod with a lungo setting dilutes the coffee too much. Match your pod intensity to your volume.
Low water level – Insufficient water affects pressure and temperature, resulting in under-extraction. Always maintain adequate water in the tank.
Incorrect pod insertion – If the lever isn't fully closed or the pod is misaligned, water bypasses the coffee instead of flowing through it properly.
Machine needs descaling – Scale buildup is the #1 cause of weak coffee. It restricts water flow and lowers brewing temperature, preventing proper extraction. If you haven't descaled in over 3 months (or 2 months with hard water), do it now.
Q4: Is leaving the used pod in the chamber bad?
Yes, absolutely. This is one of the biggest mistakes new users make.
Used coffee grounds in a warm, damp environment become a breeding ground for mold and bacteria within hours. This creates health risks and makes your machine smell musty.
The grounds can dry out and clog the puncture needle, causing brewing problems or leaks in future uses.
Stale coffee oils from the old pod contaminate your next brew's flavor.
Best practice: Remove used pods immediately after brewing or at minimum by the end of the day. Empty the used pod container regularly—don't let pods pile up for days.
Q5: How often should you descale a pod machine?
Standard recommendation: Every 3-6 months or after 300 capsules, whichever comes first.
For Indian conditions: Every 2-3 months, especially in cities with hard water like Delhi, Mumbai, Pune, Bangalore, and Jaipur. Our water's high mineral content accelerates scale buildup significantly.
Signs you need to descale immediately:
Coffee takes longer to brew than usual
Reduced flow or dripping instead of streaming
Coffee tastes weak or bitter despite using good pods
Machine makes unusual grinding or clicking noises
Temperature seems lower than normal
Pro tip: Use filtered water for every brew. It dramatically reduces scale formation and you'll only need to descale 2-3 times a year instead of 4-6 times.
Q6: Can I make a latte or cappuccino using a pod machine?
Yes, but you need two components: the pod machine for the espresso base, and a separate milk frother for the steamed milk.
Here's the process:
Brew an espresso-size pod (25-40ml) into your cup
In a separate pitcher, heat and froth your milk using a frother
Pour the frothed milk over the espresso
For a latte: More milk, less foam (about 150-200ml milk to your espresso shot) For a cappuccino: Equal parts espresso, steamed milk, and foam (about 60ml milk + 60ml foam to your espresso)
Milk frothers range from ₹500 for manual frothers to ₹3,000+ for automatic ones. It's a worthwhile investment if you love milk-based drinks.
Remember: Never run milk through your pod machine itself. Always add it to your cup separately.
Q7: Are there eco-friendly pod options?
Absolutely, yes. Environmental consciousness in the pod coffee world has improved dramatically in recent years.
Aluminum capsule recycling – Nespresso and similar brands offer collection programs where you can return used aluminum capsules. They're separated into aluminum (recycled) and coffee grounds (composted).
Compostable pods – Made from plant-based materials that completely break down in commercial or home composting. Londonkart stocks several brands offering these options without compromising flavor quality.
Reusable stainless steel capsules – Fill them with your choice of ground coffee. Zero waste per cup, though you sacrifice some convenience for manual filling and cleaning.
E.S.E. paper pods – These soft pods use minimal packaging and the paper filter is fully biodegradable.
My recommendation: Start with compostable pods to maintain convenience while reducing environmental impact. If you're brewing 3+ cups daily, consider reusable pods for weekday use and save the compostable single-use pods for special occasions or when time is tight.
Many Indian cities now have better waste segregation, making composting coffee grounds more practical. The used grounds also make excellent garden fertilizer if you have plants.
Conclusion
Mastering your coffee machine with pods really comes down to three simple things: proper setup, consistent maintenance, and understanding your machine's quirks. You don't need to be a barista or a coffee expert—just someone willing to spend a few extra minutes doing things right.
The beauty of pod systems is they've democratized great coffee. What used to require expensive equipment, technical skills, and years of practice is now accessible to anyone with a pod machine and quality capsules. Whether you're grabbing a quick espresso before your morning commute or crafting a perfect cappuccino on a lazy Sunday, your machine delivers consistent results every single time.
Remember the key takeaways: preheat your cup, remove used pods promptly, descale regularly (especially with Indian water), and never run anything except water through the machine. These simple habits separate mediocre coffee from exceptional brews.
Now it's time to experiment! Explore Londonkart's extensive range of premium pods and discover your favorites. From bold, intense espressos to smooth, mellow lungos, from classic roasts to exciting flavored options—there's a whole world of coffee waiting in those little capsules.
What's your favorite pod flavor or brewing tip? Drop a comment below and share your experience with fellow coffee enthusiasts! And if you're ready to stock up on premium pods delivered right to your doorstep, [check out Londonkart's collection here] and elevate your home brewing game today.
Happy brewing! ☕


Comments